
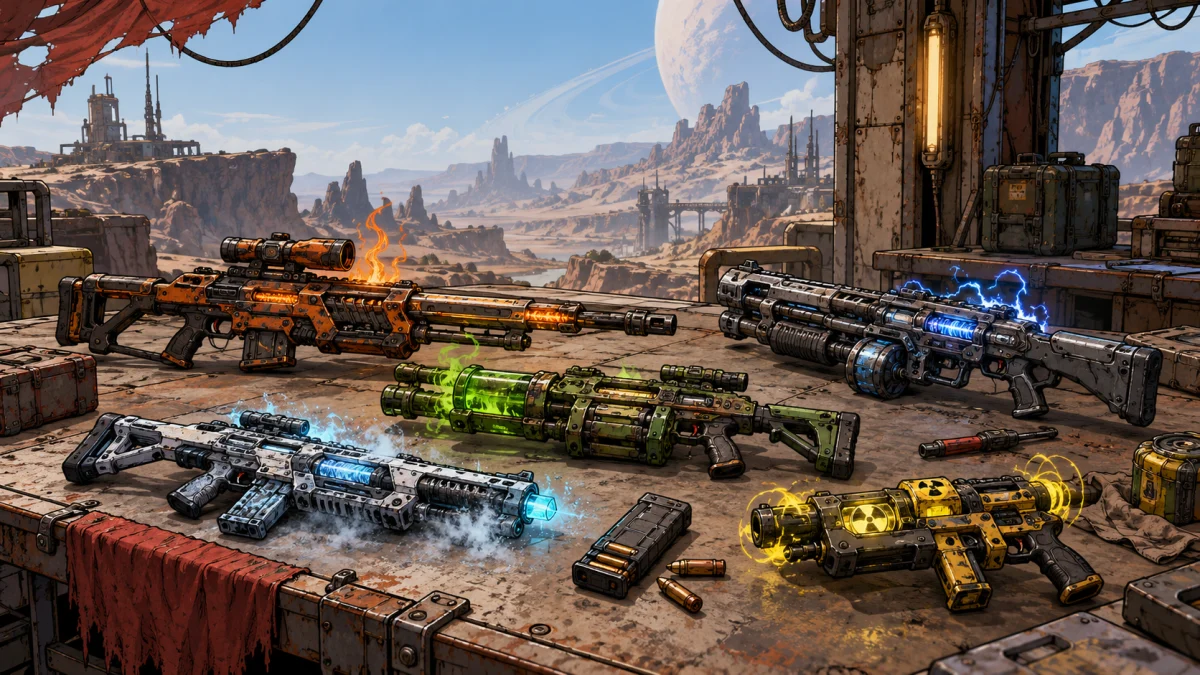
The shortest useful answer: The best gun in Borderlands 3 is not necessarily the one with the highest Damage, Item Score, rarity or level. A weapon’s real value depends on how it delivers damage, how many shots hit, which health bar the enemy has, how long you can keep firing, what its special effect does and how it interacts with your Vault Hunter’s build.
If a gun says 500 x 8, that usually means eight projectiles worth 500 damage apiece, not a single 500-damage shot. If its description also says +125% Weapon Damage, that bonus is generally already included in the 500 displayed on the card. And even if its theoretical output is impressive, the weapon may lose to a weaker-looking gun if half its pellets miss or it fires the wrong element into armor.
This guide explains the entire system so you can make those decisions for yourself. It covers ordinary guns, exceptional Legendaries, damage calculations, enemy weaknesses, parts, levels, Anointments, endgame scaling, grenade interactions, farming and inventory management. It is about Borderlands 3 specifically, not mechanics borrowed from Borderlands 2 or Borderlands 4.
How to use this page: New players should start with the 30-second weapon comparison, the weapon-card decoder and the elemental charts. Experienced players can jump to damage math, Anointments or Mayhem scaling.
Scope and evidence: Numbers labeled illustrative are examples, not measurements of a particular drop. Game rules are distinguished from community-researched damage formulas and variable individual-weapon behavior. The game’s official level-cap announcement, Mayhem 2.0 explanation, specialist Lootlemon database and credited BL3 damage research form the technical foundation. See the references and currency notes at the end.
Navigate this guide
This is a reference, not a guide you must read in one sitting. Choose the question that matches what you are trying to do:
| I want to… | Start with… |
|---|---|
| Compare two weapons quickly | The 30-second comparison |
| Understand everything on a gun card | Reading the weapon card |
| Work out what the damage, Accuracy and Handling numbers mean | Damage and projectiles, DPS, Accuracy and Handling |
| Choose a gun class or manufacturer | Six firearm classes, nine manufacturers |
| Pick the right element for an enemy | Elemental matchup charts, enemy responses |
| Understand parts, rarity, levels and Legendary effects | Weapon parts, rarity and red text, level scaling |
| Understand Mayhem, damage math and Anointments | Mayhem, advanced calculation, Anointments |
| Figure out where guns come from and which to keep | Loot sources, inventory, farming |
| See real gun examples | Ten practical comparisons, field testing |
| Find a quick answer to a specific term | Frequently asked questions, glossary |
Quick reference: What every weapon statistic means
| Weapon-card field | What it measures | What it does not tell you |
|---|---|---|
| Damage | Listed damage for a projectile or attack unit; sometimes damage x projectile count |
Damage after all character, critical-hit, enemy and special-effect calculations |
| Accuracy | A game-defined rating related to shot spread | A literal percentage of bullets guaranteed to hit |
| Handling | A rating related to recoil, sway and weapon control | The same thing as Accuracy or raw damage |
| Reload Time | Time for the weapon’s reload behavior, as represented on its card | Effective downtime for every unusual firing/reload mechanic |
| Fire Rate | Shots or firing events per second in the listed mode | Damage per second, especially on multi-projectile or charged guns |
| Magazine Size | Ammunition held before a conventional reload | Shots per magazine when a trigger pull costs multiple ammo; COV guns work differently |
| Element and status | Damage type and, where displayed, status damage/chance or Cryo efficiency | Guaranteed status application or identical performance against all health bars |
| Bonus lines | Modifiers from a weapon’s generated properties, such as damage, critical bonus or zoom | A set of percentages you should blindly multiply into the top stats again |
| Rarity | Loot classification: white, green, blue, purple or orange | An objective ranking of how useful a weapon is for your build |
| Item Score | A broad in-game gear rating | The weapon’s actual DPS or practical value |
| Anointment | A separate, usually conditional high-level equipment effect | A permanent passive bonus from every gun sitting in your four weapon slots |
| Red text | A clue that a unique or Legendary effect exists | A complete technical description of that effect |
The 30-second weapon comparison
When a new gun drops, check these seven things in order:
- Is it appropriately leveled? A level-20 weapon and a level-40 weapon are not directly comparable on equal terms. At endgame, check Mayhem level as well.
- How is damage delivered? One bullet, eight pellets, sticky explosions, a charged beam, ricochets or bonus projectiles? Read the whole weapon, not just the first number.
- How many hits will actually connect? Consider spread, recoil, projectile speed and your usual combat range.
- What does the target resist? Shock favors shields, incendiary favors flesh, corrosive favors armor. Cryo, radiation and non-elemental damage offer other tradeoffs.
- What happens after the first few seconds? Count ammo cost, magazine size, reloads, heat and charging time, not just fire rate.
- Does it have a special effect or Anointment? The hidden or conditional mechanic may matter more than the visible stats.
- Does it help your particular character and loadout? A splash-damage specialist and a critical-hit specialist can prefer very different guns.
Rule of thumb: During the story, carry reliable weapons and cover multiple enemy types. In endgame, build synergy, Mayhem-scaled gear, special effects and Anointments become increasingly important. Neither stage requires memorizing a list of 300 guns.
How to read a Borderlands 3 weapon card
The item card is a summary of a generated weapon, not a full performance report. The game combines a weapon family, manufacturer, parts and sometimes a fixed unique effect into a card with a level requirement, rarity, statistics and descriptive lines.
A simplified, fictional card might read:
[ORANGE] Illustrative Legendary Assault Rifle
ITEM SCORE: 650                   LEVEL REQUIREMENT: 50
DAMAGE: 700 x 2                   ACCURACY: 72%
HANDLING: 65%                     RELOAD TIME: 2.4s
FIRE RATE: 7.0/s                  MAGAZINE SIZE: 30
ELEMENT: SHOCK
+110% Weapon Damage
+15% Weapon Fire Rate
3.0x Weapon Zoom
[Red text describing an unusual effect]
[Conditional Anointment, if present]
None of those numbers depicts a real named gun. The example exists to demonstrate the reading order.
Name, manufacturer, type, rarity and level
The name often combines a base family and a prefix associated with a part or property. The manufacturer tells you which signature operating system to expect. The weapon type tells you which ammunition category and combat role it normally occupies. The rarity color describes the item’s loot class; the level requirement determines when your character can equip it.
Do not confuse the level of a weapon with its Item Score. A level is a progression requirement. Item Score is an approximate rating built from item characteristics. Neither replaces testing.
The damage field: 700 x 2
Read this as 700 listed damage per projectile, with two listed projectiles per firing event, for a theoretical 700 x 2 = 1,400 when both hit before other modifiers. A 700 gun firing only one projectile is not automatically equivalent.
This notation is common on shotguns but also appears on some pistols, rifles, SMGs and Legendaries. Extra ricochets, splash events, homing attacks or secondary explosions may not be summarized in this top-line multiplication.
The most common mistake: Double-counting the plus percentages
Suppose the fictional gun reads Damage: 700 x 2 and +110% Weapon Damage below it. The +110% is normally part of how the game reached the displayed 700; it is not an instruction to calculate 700 x 2 x 2.10. The same general principle applies to listed fire-rate and magazine modifiers already represented in the card’s final field. The long-standing Borderlands item-card reference makes this distinction, and player confusion about it persists.
There is a crucial exception to the broad rule: not all listed bonuses are already visible in the Damage field. Weapon critical-hit damage, conditional effects, melee modifiers, splash interactions and Anointments may apply when the attack meets their conditions. The safest question is not "Is this a percentage?" but "Which statistic or calculation stage does it modify?"
Accuracy, Handling, reload, fire rate and magazine
These fields describe the weapon’s ordinary operation, but they interact. A large magazine can be valuable because it reduces reload interruptions; it does not make every individual shot more powerful. Higher fire rate can improve burst output, but it can also burn ammunition and produce more recoil. Handling affects control, not inherent bullet damage. Their practical meaning is explained below.
Element, status and unusual card fields
An elemental icon identifies the weapon’s damage type, while a separate line may show status-effect damage per second, chance or Cryo efficiency. Some Maliwan guns can switch between two elements. Some COV weapons replace the familiar magazine/reload presentation with heat and repair properties. Zoom, melee modifiers, splash bonuses or critical-hit bonuses can appear among additional card lines.
Red text and Anointments are different
Red text generally identifies a unique behavior, often cryptically. It can signal ricochets, secondary projectiles, special reloads, healing, changing damage, or entirely different damage classification. Anointments are conditional equipment bonuses shown separately. A red-text ability belongs to that weapon’s design; a different Anointment may roll on another copy of the same weapon.
For individual-weapon exceptions, consult a part-and-effect reference such as the BL3 Lootlemon catalog. Its weapon pages distinguish unique ability, parts, element and acquisition information.
How to inspect parts and firing modes
Open the inventory, highlight the weapon and use the on-screen Inspect prompt. The inspection interface exposes Parts and their effects. The exact input varies by keyboard/controller and platform. On compatible guns, the alternate-fire control cycles manufacturer-specific modes. If the prompt is unclear, follow the control binding shown in your game’s menu rather than a fixed button name from an old guide.
A part description may show, for example, +5% Fire Rate with -10% Accuracy, making an otherwise mysterious roll understandable. Some parts change the number of projectiles or ammo cost, a much more important change than a few points of item score.
Important: BL3 guns do not use the same cross-manufacturer Licensed Parts system introduced in Borderlands 4. Do not apply BL4 part combinations to this game’s drops.
Damage, projectiles and ammunition cost
A good weapon comparison starts by separating damage per projectile, damage per trigger pull and ammunition spent per trigger pull.
Damage per projectile versus total damage
For a normal multi-pellet attack:
Theoretical trigger damage = listed damage per projectile x listed projectile count
For instance, a shotgun with 230 x 8 can deliver 1,840 damage if all eight pellets connect with the relevant target, before enemy-type, critical, skill and other modifiers. If only three pellets land, the base landed total is 230 x 3 = 690, not 1,840.
A shotgun with 800 x 2 may be more accurate at longer distances. A 230 x 8 shotgun might dominate up close. The first is not "worse" simply because its perfect-hit total is smaller.
Ammo per shot is a separate specification
Eight projectiles do not necessarily cost eight ammunition units. A shotgun can launch multiple pellets for one ammo or spend two or more ammo units per trigger pull, depending on its parts. For an ordinary magazine-fed weapon:
Approximate full trigger pulls = floor(magazine capacity / ammo cost per trigger)
If a 24-round magazine fires 2 ammo per trigger pull, you normally get 12 firing events per magazine, not 24. Certain guns, alternate modes, replenishment skills and special effects break this simplified model. The Lootlemon DPS tool therefore asks for Cost/Shot and Projectiles separately.
Secondary projectiles and events are not always on the card
A projectile can hit a target, ricochet, split, explode, return, penetrate another target or create more projectiles. The basic Damage x Projectiles number does not fully describe those events. One bullet that detonates twice or ricochets into three enemies can produce more total encounter damage than a bullet with a larger initial hit.
Also separate gun damage, melee damage and splash damage. The source of an attack determines which bonuses apply. The Face-puncher, for example, is carried as a shotgun, but its damage is treated as melee damage rather than conventional shotgun damage and does not score normal critical hits. A class label alone cannot tell you which mathematical bonuses apply.
Fire rate, reload time, magazine size and real DPS
DPS means damage per second. It sounds straightforward until a weapon must reload, charges before firing, misses shots or costs several ammunition units per attack.
Burst DPS
A useful first estimate for a conventional gun is:
Burst DPS = damage per trigger pull x firing events per second
If it deals 300 damage and fires 8 times a second, its theoretical firing-window DPS is 2,400. This ignores accuracy, enemy health types, crits, loading, special effects and reload downtime.
Magazine damage
For a straightforward magazine-fed gun:
Approximate magazine damage = damage per trigger x trigger pulls before reload
If the magazine holds 16 rounds at one round per firing event, a 300-damage attack yields 4,800 damage per magazine. If it takes two ammo per attack, the trigger count and calculation change.
Sustained DPS
An approachable full-cycle estimate is:
Sustained DPS ~ magazine damage / [(firing events / fire rate) + reload time]
This convention counts the full firing cycle and a subsequent reload; it is especially useful for comparing long engagements. Timing from first projectile to final projectile can differ by about one firing interval, and charge, heat, unusual animations, ammo restoration and staggered volleys require a model fitted to that weapon. Do not mistake the formula for the game’s universal internal damage engine.
Worked example, deliberately hypothetical:
| Variable | Gun A | Gun B |
|---|---|---|
| Damage per firing event | 300 | 400 |
| Firing events/second | 8 | 5 |
| Magazine (1 ammo/event) | 16 | 25 |
| Reload | 2.0 sec | 1.0 sec |
| Burst DPS | 2,400 | 2,000 |
| Magazine damage | 4,800 | 10,000 |
| Approx. full-cycle DPS | 1,200 | 1,667 |
Gun A wins for sheer firing-window output. Gun B wins for long, repeated magazine cycles. If a normal enemy dies during the first second, Gun A’s reload disadvantage might not matter. If Gun B is better suited to the enemy’s health bar, the actual gap might grow further.
Time-to-kill and overkill
Damage arrives in discrete hits. Suppose an enemy needs 1,100 damage to die. Four 300-damage hits do the job; three 400-damage hits also do. The exact time depends on first-shot startup, intervals, hits landed, criticals and reloads. A weapon that displays slightly higher theoretical DPS may not deliver the faster kill if damage arrives at inconvenient intervals.
Overkill also matters: damage delivered after the lethal threshold does not make that particular enemy any deader, although some game abilities explicitly use excess damage. This is one reason shotguns and precision weapons can feel more decisive than average DPS suggests.
Accuracy, Handling, recoil, range and projectile speed
These are different mechanics, and the distinction is among the most useful lessons in the game.
Accuracy is not hit probability
70% Accuracy does not mean precisely 70 of every 100 shots will hit. It is a weapon rating related to its spread. Target size, distance, aiming, movement, firing pattern and projectile mechanics determine whether a shot actually connects.
A shotgun can produce devastating point-blank damage but lose much of its theoretical output at range because individual pellets fan outward. Conversely, a rifle with lower listed damage can outperform it if most of the rifle’s hits land on the target.
Handling is not Accuracy
Handling describes a weapon’s control behavior, including recoil and sway. A controllable gun can keep its sight on a moving weak point more effectively during a long burst. That makes control indirectly valuable for DPS because it improves the fraction of shots that land, even when the damage number is unchanged.
Recoil, sway and accuracy bloom
- Recoil: The movement of the weapon or aim after firing, vertical or horizontal.
- Sway: Sight or aiming motion, especially noticeable at magnification.
- Bloom: Spread that can widen during rapid fire and recover after you stop shooting.
- ADS: Aiming down sights, which can change sight picture, spread and control.
- Zoom: Sight magnification, not a direct damage multiplier.
A weapon part that reduces recoil or bloom can be more important than a small damage increase on a sniper rifle, long-range SMG or critical-focused build.
Projectile speed and lead
Not every gun behaves like an instantaneous bullet. Some projectiles travel visibly, arc, track targets or move in patterns. Slower projectiles require you to lead moving enemies and can miss because the target leaves the path before impact. At close range this may be negligible; against flying or evasive enemies it can be decisive.
An effective-damage thought experiment
Imagine two guns, each showing 2,000 theoretical burst DPS. At the distance you’re fighting, you land 40% of one gun’s damage and 85% of the other’s. Before any other modifiers, their delivered rates are approximately 800 and 1,700 damage/second. These hit rates are hypothetical and are not measured from the Accuracy stat. They illustrate why handling and range matter so much.
Critical hits, weak points and sniper bonuses
A critical hit is an attack on an enemy’s designated vulnerable location or an attack made critical by a special ability. It is not always a headshot: nonhuman enemies, robots and bosses can have different critical zones. Their vulnerability may move or become inaccessible during phases.
BL3 critical damage is more complex than "every critical is exactly double." Community testers describe a basic x2 critical factor modified by weapon-specific bonuses, weapon type, manufacturer, skills, class mods, Guardian bonuses and other effects. In documented general models, sniper rifles have an additional critical modifier, and Jakobs and Hyperion also have manufacturer-related critical modifiers. The exact arrangement matters because some categories multiply separately. See the BL3 critical-hit research, which discusses the underlying test model and exceptions.
If a card says +50% Critical Hit Damage, do not treat that as already baked into ordinary noncritical Damage. It matters when a qualifying hit is critical. The extra payoff can be large when you consistently hit weak points and negligible when you do not.
Some weapon abilities cause automatic criticals or have attacks that do not qualify for conventional critical damage. A notable example is the Face-puncher, whose special damage classification changes what bonuses it receives.
Splash damage, explosions and chained attacks
Splash describes area damage, not a sixth BL3 element. A splash attack may be fire, corrosive, shock, cryo, radiation or non-elemental. This matters because an attack can be affected by both splash-related bonuses and elemental matchup rules.
A direct-hit explosion may contain separate impact and area components. Some weapons generate new explosions after a delay, after reload or when an enemy dies. It is therefore unsafe to assume every explosive animation corresponds to one Damage number.
For example, the Kaoson fires sticky projectiles that create both initial and delayed splash events. The Kaos can create an additional elemental explosion when an enemy is killed. Their practical power depends not only on first-hit damage, but also on splash bonuses and whether the secondary event damages more enemies.
Safety while playing: Splash weapons may damage the player at close range. Test their effective radius before using them point-blank, particularly with strong self-damage builds or confined corridors. Do not assume every visual explosion can hurt its owner in exactly the same way.
Ammo economy, charging, heat and firing uptime
A high-DPS weapon may be difficult to sustain if it empties its reserve ammunition during one boss encounter. Evaluate damage per ammo unit as well as damage per second.
Approximate damage per ammo = landed damage across attacks / ammo units consumed
A multi-projectile weapon that doubles pellets but doubles ammo consumption does not automatically double efficiency. It might still be much better at delivering burst damage or triggering skills.
Maliwan charging: Some guns require a charge before firing a shot or starting a burst. A weapon with impressive firing statistics can feel sluggish in short fights if you must wait for each attack. Other Maliwan weapons alternate elements or sustain beams; inspect the specific model.
COV heat: COV weapons feed directly from reserve ammunition rather than a conventional detachable magazine. Firing builds heat; heat dissipates when you stop, and reaching the limit forces a repair/overheat animation. The COV technical reference explains why cooling and repair replace ordinary magazine cycling. Heat capacity, fire rate, repair speed and ammo per attack together govern uptime.
Weapon-specific ammunition systems: Some Legendaries restore ammunition, regenerate it, consume unusual amounts or turn reloads into attacks. These require their own firing-cycle estimate instead of applying the conventional magazine formula blindly.
The six firearm classes and what they are for
A gun’s class tells you its general ammunition category and intended role. Its manufacturer and unique behavior determine how far a particular gun departs from that role. In BL3, the main firearm categories are pistols, SMGs, assault rifles, shotguns, sniper rifles and launchers/heavy weapons. The Eridian Fabricator is a separate special device discussed later.
| Class | Usually useful for | Main tradeoff to check | Ammo category |
|---|---|---|---|
| Pistol | Flexible backup, precision, burst or elemental damage | Extremely broad variation; some cost multiple ammo/shot | Pistol ammo |
| SMG | Mobile short- to medium-range sustained fire | Range, spread and ammunition consumption | SMG ammo |
| Assault rifle | General-purpose medium-range combat | May trade precision for rate of fire or special attachments | Assault rifle ammo |
| Shotgun | Close-range burst, pellet-based procs, crowd control | Spread, range, reload, shot cost | Shotgun shells |
| Sniper rifle | Weak-point damage and long-range precision | Fire rate, handling, scope and ammunition | Sniper ammo |
| Heavy weapon / launcher | Explosive bursts, groups and large targets | Scarce ammunition, self-damage risk, slow projectiles | Heavy ammo |
Pistols are a category, not a guarantee of low damage. Some revolvers deliver exceptional single-shot damage. Other pistols function like automatic SMGs, explosive launchers or complex elemental weapons. There is no reason to discard a high-performing pistol just because the word sounds less impressive than "assault rifle."
SMGs reward hit consistency. Their apparent advantage is often firing quickly while moving, but recoil, charge-up and ammunition cost vary widely. The Plasma Coil, for example, is officially classed as an SMG yet operates through charged bursts of elemental splash projectiles.
Assault rifles are versatile, not uniformly average. An Atlas tracking rifle, Jakobs precision rifle and Torgue explosive rifle may solve entirely different problems despite sharing an ammo category.
Shotguns depend on pellet delivery. Distance and enemy size can matter as much as theoretical total damage. Some unusual shotguns deal melee-classified damage or emit unexpected projectiles.
Sniper rifles are not automatically the highest-damage answer. They typically benefit from precision and critical-hit bonuses, but a moving weak point or slow reload can make a different weapon faster and safer. The Sand Hawk is an instructive exception: it is a sniper-rifle-class weapon that shoots a spread of traveling elemental projectiles and uses substantial ammo per trigger.
Launchers are not just "the big damage number." They can provide large single-hit bursts, multiple rockets, homing fire, splash or area denial, but may spend ammunition far faster than it can be replenished. Evaluate sustained usefulness and the weapon’s real projectile pattern.
All nine Borderlands 3 weapon manufacturers explained
Manufacturers are the game’s strongest shorthand for how a weapon operates, but they are not a numerical quality ranking. A gun can be excellent or poor for your current encounter regardless of its brand.
| Manufacturer | Usual defining system | Why players choose it | What to watch |
|---|---|---|---|
| Atlas | Target tagging and tracking projectiles | Hitting moving targets from awkward angles | Time and accuracy needed to apply tracking |
| COV | Reserve-fed guns with heat, cooldown and repairs | Long firing runs without normal magazine reloads | Spin-up, overheating, ammo drain and repair downtime |
| Dahl | Selectable firing modes and scopes | Consistent, controllable precision | Mode-specific rate of fire and burst delays |
| Hyperion | Accuracy that improves while firing; weapon shields when aiming | Sustained precision, defensive aiming | Initial spread, movement and shield behavior |
| Jakobs | Impact and critical-hit ricochets | Precision, strong single hits and weak-point play | Element availability, reloads and dependence on accuracy |
| Maliwan | Elemental specialization and charging/alternate elements | Health-bar matching and status effects | Charge time, projectile travel and element mismatch |
| Tediore | Throwing the gun on reload | Turning reloads into offensive events | Ammo spent when thrown and variant-specific behavior |
| Torgue | Splash/explosives, often impact or sticky mode | Burst and splash-focused builds | Slow projectiles, sticky timing and self-damage |
| Vladof | Fast firing and underbarrel alternatives | Volume of fire and flexible attachments | Ammo economy, spread and attachment behavior |
This roster and the class distinctions are consistent with the BL3 manufacturer reference and specialist weapon-family guide.
Atlas: Tag first, then track
Atlas guns can launch a tracker projectile, dart, puck or grenade, then direct ordinary shots toward marked targets. That can be valuable against enemies that strafe, fly or move behind partial cover. But tracking is not free: you may spend time applying the mark, and the target or mark may be lost before you fully exploit it.
Practical test: Compare the time required to tag and defeat a moving target against the time needed to hit it directly with a more accurate rifle. Atlas can win where traditional aim is unreliable, but lose against stationary enemies you can already hit.
COV: Manage the heat instead of a magazine
Children of the Vault weapons use a shared reserve-ammunition feed and can fire until they overheat, then require repair. Some also need time to get going after being drawn. Short bursts and cooling intervals can be better than holding the trigger until the weapon breaks. "Infinite magazine" does not mean infinite ammunition.
Practical test: Record how many seconds you can fire before overheating, how long cooling takes and how long repair takes. That is more useful than pretending the displayed heat figure is a normal magazine.
Dahl: The same gun can be two firing systems
Dahl’s selectable modes can change automatic, semi-automatic or burst behavior and sometimes the optic. A burst’s advertised rounds per second is not always the same as its long-run cycle after burst pauses. A slower mode that improves stability or critical-hit consistency may win despite lower nominal output.
Practical test: Try each mode on a stationary target and a moving target; compare both recoil control and the speed with which a full magazine is delivered.
Hyperion: Accuracy improves as you fire
Hyperion’s signature accuracy behavior rewards sustained firing. A shield projected while aiming adds a defensive dimension: staying on target can be both easier and safer, although shield characteristics vary. Hyperion is especially interesting when consistent repeated hits matter more than one enormous opening shot.
Practical test: Compare the first few rounds of a burst with the later ones. The pattern often matters more than one static Accuracy score.
Jakobs: Make each hit count
Jakobs favors high-impact shots and critical-hit ricochets. On suitable targets, accurate weak-point shooting can turn a single attack into multiple damaging events. Many ordinary Jakobs guns are non-elemental, but exceptional items can differ. Do not infer that every named Jakobs weapon shares every generic rule.
Practical test: Compare ordinary body hits with critical hits, then see whether ricochets actually reach nearby enemies. Precision makes this manufacturer disproportionately valuable to some players and builds.
Maliwan: The right element, delivered at the right time
Maliwan weapons emphasize elemental damage. Many offer a choice between two elements; others need to charge, sustain beams or use unusual projectile behavior. Their advantage is often that the same gun can respond to shields, flesh or armor. Their disadvantage may be startup time or a bad matchup.
Practical test: Measure how a charge affects the first kill in a short encounter, then switch elements when the enemy’s blue shield becomes red health. More shots per second are not always more useful than dealing the correct kind of damage.
Tediore: Reloading is a second attack
Reloading a Tediore gun throws it. Depending on the specific weapon, the thrown gun may explode, bounce, track a target, grow legs or produce additional projectiles. Some behaviors use the ammunition remaining at the throw, so early reloads can change the tradeoff between damage and ammo economy.
Practical test: Compare firing the magazine normally with throwing after a few shots. Do not assume the ordinary weapon-card reload time describes all the damage produced by the reload.
Torgue: Explosive output and sticky timing
Torgue frequently offers impact and sticky projectiles. Sticky shots can detonate after being attached, reloading or another trigger, and stacking them on a target can alter damage. These delayed events make burst timing, reload cadence and splash bonuses especially important. The exact formula is weapon-dependent; broad community research explains why Torgue stickies require special calculations.
Practical test: Stick several projectiles to a large enemy and observe impact versus later explosions. A miss can erase much of the expected damage.
Vladof: Fast firing and meaningful alternate attachments
Vladof is associated with rapid fire, large magazines and secondary attachments such as underbarrel launchers, bipods or additional barrels. More firepower can mean rapid ammunition loss, increased spread or movement restrictions.
Practical test: Compare the normal firing mode with the attachment while moving. The Monarch is an extreme teaching example: its bipod mode increases projectiles but imposes substantial movement restrictions. Damage output and positioning are inseparable.
Which manufacturers make which firearm classes?
Not every manufacturer produces a standard gun in every category. The following is the ordinary BL3 manufacturer/class framework. Rare special items may behave unlike their nominal category; the matrix describes cataloged weapon types, not every possible alternate attack or lore weapon.
| Manufacturer | Pistol | Assault rifle | SMG | Shotgun | Sniper | Launcher |
|---|---|---|---|---|---|---|
| Atlas | Yes | Yes | – | – | – | Yes |
| COV | Yes | Yes | – | – | – | Yes |
| Dahl | Yes | Yes | Yes | – | Yes | – |
| Hyperion | – | – | Yes | Yes | Yes | – |
| Jakobs | Yes | Yes | – | Yes | Yes | – |
| Maliwan | Yes | – | Yes | Yes | Yes | – |
| Tediore | Yes | – | Yes | Yes | – | – |
| Torgue | Yes | Yes | – | Yes | – | Yes |
| Vladof | Yes | Yes | – | – | Yes | Yes |
Basis: the manufacturer compatibility matrix and the weapon-family catalog. This is for Borderlands 3, not the original Borderlands or Borderlands 4.
A weapon’s underbarrel shotgun does not turn its primary assault rifle into a shotgun-class item for ordinary inventory classification. Likewise, an explosive SMG may remain an SMG even though its projectile is more launcher-like than bullet-like.
How generated weapon parts, prefixes and rolls work
Procedural loot does not mean every combination is possible. Borderlands 3 generates weapons using manufacturer-specific families and allowed parts. A part may modify Damage, Accuracy, Fire Rate, reload, magazine, projectile count, melee damage, charge speed, critical bonuses, zoom or other attributes. Some are constrained by the weapon’s body/barrel or other parts.
Bodies, barrels, grips, stocks, magazines and optics
Common part categories include:
- Body/barrel: Usually establishes the fundamental weapon family or firing behavior.
- Grip/foregrip: May alter damage, recoil, fire rate, pellets, ammo cost or control.
- Magazine: Influences capacity and reload, sometimes trading size against damage.
- Stock: Often affects handling, sway and recoil.
- Scope/rail: Influences sight picture and zoom, sometimes with stat effects.
- Elemental part: Determines available damage type where the gun supports it.
- Manufacturer-specific components: Atlas tracking systems, COV heat components, Vladof attachments and other specialized systems.
A concrete example: Lootlemon’s Kaoson parts list includes configurations that can alter projectile count and shot cost, plus magazines balancing damage against capacity. You can inspect the same underlying model and obtain meaningfully different rolls.
Prefixes are clues, not a complete universal dictionary
Prefixes often describe a part, elemental property or specific weapon variation, but naming rules are tied to manufacturer and gun family. The same adjective does not necessarily have one identical effect throughout the entire game. Some unique/Legendary names override ordinary naming conventions.
Best method: Inspect the actual parts of your dropped weapon. If the gun has a unusual named effect, check that weapon’s dedicated page rather than assuming the prefix explains it fully.
Alien barrels and E-tech-style behavior
Some ordinary generated BL3 guns use alien-looking parts that radically alter projectiles: beams, unusual balls, splitting fire, alternate elemental delivery or exceptional ammo cost. This is not a separate rarity tier or a new conventional manufacturer. An alien barrel can make an apparently normal-looking weapon class behave very differently in combat.
What is a god roll?
A god roll is a particularly desirable combination of a weapon’s available parts and attributes for a defined use. There is no universal perfect roll independent of builds. Maximum listed damage might be attractive for one-shot critical kills; more projectiles might be attractive for another build; a larger magazine or faster charge might improve real uptime.
Even a specialist database’s maximum DPS configuration represents a specified calculation, not an absolute verdict on what is best for every player. Check the roll’s element, mode, projectile count, ammo cost, magazine, relevant Anointment and build synergy.
Rarity, unique weapons and Legendary red text
BL3 uses five standard rarity colors:
| Color | General tier | Practical interpretation |
|---|---|---|
| White | Common | Basic gear; can temporarily be useful when level-appropriate |
| Green | Uncommon | Ordinary gear with potentially useful properties |
| Blue | Rare | Includes some named mission rewards and unique effects |
| Purple | Epic | Can have strong stats or part combinations, sometimes outperforming orange items |
| Orange | Legendary | Usually has a distinct special effect or designed identity; performance varies |
Unique and Legendary are not synonyms. A unique quest reward may be blue or purple. Some Epic guns have powerful fixed effects. The Crit, for instance, is an Epic Maliwan SMG with lifesteal and a reload-related drawback. Conversely, orange rarity does not guarantee that a Legendary fits your character or that its item card reveals how to use it.
Pearlescent is not a standard unmodded BL3 weapon rarity. Do not import Borderlands 1/2 or Borderlands 4 rarity systems into this guide, or confuse PC modifications with normal game loot.
Red text: Read, then verify the actual effect
Legendary red text is sometimes a clue, joke or reference rather than a specification. It does not necessarily identify the amount of extra damage, number of secondary explosions or conditional trigger. Research the exact weapon if its behavior is important.
A few highly instructive cases:
| Weapon | What makes it unusual | Lesson |
|---|---|---|
| Hellwalker | Jakobs fire shotgun with a fixed pellet pattern and one-shot reload | Damage per trigger and reload cadence matter more than a large magazine |
| The Monarch | Vladof rifle with projectile-rich bipod firing and movement restrictions | More projectiles can come with a positional cost |
| Face-puncher | Shotgun whose damage counts as melee damage | The damage category can overturn assumptions about shotgun bonuses |
| Kaoson | Direct and delayed sticky splash attacks | A single listed shot can lead to several damage events |
| Plasma Coil | Charged elemental burst SMG, from Designer’s Cut | Charge and burst timing matter; it is DLC-dependent |
| Sand Hawk | Sniper-class weapon firing multiple traveling elemental projectiles | Weapon class does not determine projectile behavior |
| Crit | Epic SMG with lifesteal and chance to fall from the player’s hands on reload | Rarity and visible damage do not describe the whole tradeoff |
These are examples of mechanics, not a definitive ranking of the best guns. Any named weapon can also be affected by level, Mayhem tier, character skills and its current roll.
The Eridian Fabricator, or Gun Gun
The Eridian Fabricator is a special device that spends Eridium to generate weapons. Its standard firing mode costs 10 Eridium and produces a set of ordinary weapons; its alternate Legendary mode costs 250 Eridium and can produce Legendary or certain unique rewards. It is a loot-production tool, not an ordinary DPS competitor.
That distinction matters: if a reader asks "What is the best Eridian gun manufacturer?" the Fabricator should not be placed alongside Atlas or Maliwan in a normal firearm comparison.
Borderlands 3 elemental damage charts
The right damage type can be more important than a moderate difference in listed weapon damage. BL3 has five elements, plus non-elemental/kinetic damage. The three main health-bar types are red flesh, blue shields and yellow armor.
The percentage below is an element-versus-health-type multiplier, not the gun’s status-effect chance and not its total final damage formula. It applies to relevant damage of that element against the current health-bar layer. Enemies may have individual resistances, skills may add extra elements, and bosses may use special defenses.
Normal-mode elemental multipliers
| Attack type | Red flesh | Blue shield | Yellow armor |
|---|---|---|---|
| Non-elemental / kinetic | 100% | 100% | 80% |
| Incendiary / fire | 150% | 70% | 70% |
| Shock | 80% | 200% | 80% |
| Corrosive | 80% | 70% | 150% |
| Cryo | 100% | 70% | 120% |
| Radiation | 100% | 100%* | 70% |
TVHM and Mayhem elemental multipliers
| Attack type | Red flesh | Blue shield | Yellow armor |
|---|---|---|---|
| Non-elemental / kinetic | 100% | 100% | 80% |
| Incendiary / fire | 175% | 50% | 50% |
| Shock | 65% | 250% | 65% |
| Corrosive | 65% | 50% | 175% |
| Cryo | 100% | 50% | 150% |
| Radiation | 100% | 150% | 50% |
Sources and qualifications: These tables draw on DocStrangelove’s post-launch, in-game elemental testing archived from the Gearbox forums, cross-checked against an earlier August 2019 community discussion of the advertised damage-type percentages. The earlier forum discussion summarizes an external video and is not itself post-launch controlled testing.
The broader Borderlands Wiki elemental overview agrees on most entries and confirms that Mayhem uses TVHM elemental multipliers even when activated from Normal mode. However, its Normal-mode Radiation-versus-shield entry is 120%, while the earlier community damage-type breakdown and the separate Radiation entry give 100%. We use 100% in the Normal table and explicitly identify the conflict rather than imply that this one disputed entry has been independently retested. The table is most reliable as a practical element-selection reference, not as a claim of original instrumented testing.
Why two otherwise similar elemental guns can show different Damage
Elemental strengths are not always a free bonus on an identical card number. For many ordinary BL3 guns, adding an elemental part also reduces the base damage printed on the card compared with an otherwise similar non-elemental version. DocStrangelove’s item-card and elemental damage testing described representative base-card reductions of approximately 20% for Incendiary, Shock and Corrosive; 25% for Radiation; and 15% for Cryo. Unique weapons, part differences and balancing exceptions can behave differently. These are a researcher’s documented generalizations, not additional penalties to apply to the displayed card value.
Here is why this matters. If a fictional, otherwise identical non-elemental gun shows 1,000 card damage and its ordinary Incendiary version shows 800, compare what reaches a Normal-mode target:
| Target layer | 1,000 non-elemental gun | 800 Incendiary gun |
|---|---|---|
| Red flesh | 1,000 x 1.00 = 1,000 |
800 x 1.50 = 1,200 |
| Blue shield | 1,000 x 1.00 = 1,000 |
800 x 0.70 = 560 |
| Yellow armor | 1,000 x 0.80 = 800 |
800 x 0.70 = 560 |
The fire version is better against flesh even though the card shows a smaller number. It is substantially worse against the other layers. In TVHM/Mayhem, the differences are larger because the elemental matchup is more extreme. The 800 already reflects the ordinary elemental-part reduction in this example; do not multiply it by 0.8 again.
What if one hit breaks a shield and carries into health?
A sufficiently powerful projectile can cross health-bar layers. Under ordinary direct-hit behavior, the part of its damage that removes the shield uses the shield multiplier, and the portion that reaches the exposed red health uses the flesh multiplier. The community damage-layer example makes this explicit.
Suppose an enemy has 200 shield and 400 flesh health, and you fire a 500-card-damage Shock projectile in Normal mode. Shock needs only 100 units of its unmodified attack to remove 200 shield because its shield multiplier is 2.0. The remaining 400 units of the original attack reach the red bar at Shock’s 0.8 multiplier, dealing another 320 flesh damage. The target survives with 80 red health.
This is why using one elemental percentage for an entire shot can be misleading when it crosses multiple layers. The calculation also illustrates why the game’s floating damage number is not automatically the same thing as the actual reduction of a single displayed health-bar layer.
How to use the table without doing math mid-fight
- Red health: Start with fire if there is no special resistance or build reason to do otherwise.
- Blue shield: Start with shock; radiation may provide useful crowd control and an alternative matchup.
- Yellow armor: Start with corrosive; Cryo is another effective choice.
- Mixed health bars: Strip the outer layer, then swap to a gun suited to the exposed layer if the time and positioning justify it.
- No matching element available: A powerful, accurate non-elemental gun can outperform a badly mismatched elemental gun, particularly during the campaign.
Illustrative calculation: Suppose two equally leveled weapons each start from 1,000 relevant elemental impact damage with no other modifiers. Against a blue shield on TVHM/Mayhem, shock’s 250% multiplier yields 2,500 damage, while fire’s 50% yields 500. The element multiplier alone makes a fivefold difference for these otherwise artificially equal attacks. Actual guns have different base damage, skills, rolls and secondary effects.
Why the element chart is not the full answer
A weapon with a lower displayed card Damage may still win after matching the target’s health type. But an Incendiary weapon with enormous critical, splash or Legendary bonuses could still beat a low-quality shock weapon against a shield. The table tells you how one category of damage is modified. It cannot replace the complete damage calculation or weapon-specific testing.
Every element and status effect, explained
Non-elemental / kinetic: Consistency with no status effect by default
Non-elemental guns do ordinary damage to flesh and shields and a modest penalty to armor under the standard BL3 table. They are useful when you do not know what you will encounter or have especially strong raw-damage, precision or critical-hit mechanics. A non-elemental weapon can still generate elemental damage through skills, Anointments or unusual unique effects.
Incendiary / fire: Flesh damage and burning
Fire’s main advantage is against red health. Incendiary status can inflict damage over time after the initial hit. It is substantially less effective against shields and armor, particularly with TVHM/Mayhem multipliers. It is generally a poor first choice for stripping a tough blue or yellow bar unless your build or the individual weapon compensates.
Shock: Shield removal and electrocution
Shock is the standard answer to blue shields and can apply shock damage over time. Its penalty against flesh and armor becomes larger under TVHM/Mayhem rules. Carrying a shock option often speeds up encounters with shield-heavy opponents, but you should be ready to switch once the underlying health bar appears.
Corrosive: Armor and corrosive damage over time
Corrosive is especially effective against yellow armor, including many mechanically armored targets. It loses efficiency against blue shields and red flesh. Corrosive status adds damage over time, but it is not a universal "armor debuff" that automatically causes all your other attacks to do bonus damage.
Cryo: Armor damage, slowing, freezing and melee synergy
Cryo deals useful impact damage against armor and can slow or freeze susceptible enemies. Cryo Efficiency is not the same as ordinary status-effect probability. It expresses freezing effectiveness in relation to target health and other conditions; resistant bosses and special enemies may not freeze normally.
The BL3 Cryo reference describes 100% efficiency as allowing freezing when a susceptible target has been reduced to roughly 20% health, with higher efficiency making earlier freezing possible. Treat that as a rule for ordinary susceptible targets, not a guarantee against bosses or immune enemies. In BL3, frozen enemies take 300% melee damage under the reference model, which creates powerful synergies with melee-classified attacks. Unlike some previous franchise implementations, BL3 Cryo does not operate as a normal Cryo damage-over-time effect.
Radiation: Auras, spreading pressure and explosions on death
Radiation is valuable for groups. Irradiated targets can damage nearby enemies through an aura; a target dying while irradiated can release a radiation explosion that may spread the effect. This creates encounter-wide damage not visible in a simple initial-hit number. Radiation tends to perform poorly against armor, while its shield matchup improves in TVHM/Mayhem.
Its strength is often total damage across several nearby enemies, not the fastest possible single-target shield strip. See the Radiation status-effect reference for the separate aura and death-explosion mechanics.
What does "status effect chance" really mean?
An elemental hit and an elemental status application are not the same event. The bullet can deal its element’s immediate damage without successfully applying the associated ongoing effect. Status chance is a probability defined by that weapon’s effects and mechanics; it is not a promise that a 20% weapon produces precisely one status effect per five trigger pulls in a short fight.
Also distinguish status damage per second from total status damage. A status lasting several seconds can accumulate damage even after the player switches weapons or stops shooting, subject to the game’s refresh, stacking and overwrite behavior. Special skills and gear can change the number and character of these effects.
Are elemental effects additive or multiplicative with other damage bonuses?
That depends on which category is being discussed. A fire-versus-flesh multiplier is not the same variable as a +fire-damage skill, a bonus fire damage Anointment or a burning status application. Community BL3 damage work shows that elemental type matching and elemental damage bonuses occupy distinct stages in the larger damage pipeline, while bonus elements can produce additional damage instances with separate elemental matchups. See the BL3 mathematical breakdown.
Elements and the environment
Elemental attacks can interact with pools of liquid, temporarily creating damaging zones. These hazards can affect players and enemies, so a shock or radiation weapon fired into water is not always harmless terrain decoration. The elemental overview documents this environmental interaction. Test it before deliberately fighting inside a pool.
Enemy resistances, health layers and the right combat response
Enemy names do not always tell you their defensive layers. Observe the color currently being depleted and how the health bars are stacked. A boss might begin with shields, transition to armor and end with flesh; another may have special immunity phases.
| Enemy situation | First weapon consideration | Why |
|---|---|---|
| Unshielded red-health enemy | Incendiary, or reliable high-damage precision | Fire’s flesh bonus; crits still matter |
| Tough blue-shield enemy | Shock; sometimes radiation for groups | Matching the shield layer accelerates removal |
| Yellow-armored target | Corrosive or Cryo | Both have armor-friendly multipliers |
| Flying or fast-moving enemy | Precise, fast projectile or Atlas tracking | Damage that misses does nothing |
| Large slow boss | Strong single-target DPS, crit/splash synergy, proper element | Large targets may make pellets and slow projectiles viable |
| Closely packed mobs | Radiation, ricochets or splash | Damage can spread across targets |
| Enemy with elemental resistance | Switch element or use reliable kinetic damage | A high card number can be offset by resistance |
| Enemy in a temporary immune phase | Reposition, reload, prepare skills | More firing does not overcome a scripted immunity |
| Enemy about to down you | Fast, reliable finishing weapon | Quick kills and Second Wind access can matter more than peak DPS |
A practical four-slot loadout philosophy
Once the story unlocks all four weapon slots, a flexible arrangement is: one dependable general-purpose gun; one way to remove shields; one solution for armor; and one specialized close-range, precision, crowd-control or boss weapon. You do not have to keep one of every element in the four slots; Maliwan toggles, secondary equipment and your character’s skills may already cover several roles.
The main purpose is to avoid a loadout with four guns that all do essentially the same job. Specialized endgame builds may intentionally make one weapon carry the majority of combat, with the others reserved for utility or particular encounters.
Weapon rarity, Item Score and levels: Which one matters most?
Short answer: Level and Mayhem tier establish the rough progression scale. Rarity describes the kind of loot. Item Score is only a broad rating. Parts, damage delivery, element, special effects and build synergy decide whether the gun is actually good.
Why a lower-rarity gun can beat a Legendary
A blue or purple gun may have much better level-appropriate damage and hit consistency than an orange gun you found 15 levels earlier. Some Legendaries also have conditional effects, high ammunition cost, awkward charges or behavior that does not suit your playstyle. Orange is a reason to inspect a gun, not a command to equip it.
During the story, a well-leveled ordinary weapon may outperform an old favorite. At endgame, powerful unique effects and synergies can make particular Legendaries disproportionately strong. These are not contradictory statements: they describe different stages of progression.
What does Item Score actually mean?
BL3 assigns an Item Score to summarize overall equipment quality. It can be convenient when rapidly sorting low-level loot, but it is not an estimate of DPS, effective elemental damage, critical-hit performance or real-world utility. Two weapons with nearly identical scores may be entirely different in combat. A high score on a gun you cannot hit with is not useful.
Better comparison order: first compare level, then gun behavior and actual damage, then enemy matchup and build synergy. Use Item Score only as a low-confidence secondary clue.
Can you level up an old weapon?
No standard in-game weapon-upgrade system lets you permanently increase a particular gun’s level or replace its rolled parts. A weapon keeps its original level and roll. You normally replace it with a newly acquired higher-level copy or a different gun. Crazy Earl’s reroll machine changes an eligible Anointment, not the underlying level, projectile roll, element or barrel.
This is an important practical difference from games where you improve a favorite gun at a crafting bench. BL3’s weapon progression is principally a system of finding replacement loot.
How quickly does damage scale with level?
For otherwise equivalent BL3 weapon rolls, community references model an approximate 9% compounded base-damage increase per weapon level:
Damage at higher level ~ starting damage x 1.09^(level difference)
The exact relationship can be obscured by rounded card values, manufacturer parts, elemental versions, balance changes and unique effects. This formula is useful for an apples-to-apples estimate, not for comparing two unrelated guns.
Illustrative comparison: A weapon that deals 1,000 damage at one level would scale to approximately 1,000 x 1.09^10 = 2,367 damage ten levels higher, if it is otherwise the same weapon with the same roll and scaling rules. That does not mean every weapon you find ten levels later deals precisely 2.37 times as much damage.
Level 72 and the campaign
Gearbox/2K raised the character level cap to 72 in June 2021. That is the reference cap for unmodified Borderlands 3. You can complete the main story long before reaching it and later continue leveling through side content, replay, DLC and endgame activities.
When should you replace your gun? Replace it when a newer weapon gives you more dependable kills in the encounters you are currently facing. Do not use a rigid "replace every three levels" rule. A powerful Legendary with a valuable special effect may remain useful for many levels; a marginal ordinary gun may be replaced immediately.
Mayhem weapon scaling and endgame difficulty
After completing the main campaign, Mayhem Mode adds repeatable progression and stronger enemies, plus weapons and some other damage sources that scale with difficulty. It changes the meaning of "same gun, same level."
Normal mode, TVHM and Mayhem are different concepts
- Normal: The original campaign mode. Enemies in ordinary story zones generally follow their designed progression, with scaling exceptions and modes.
- True Vault Hunter Mode (TVHM): A higher-level replay option with enemy scaling and more severe elemental strengths and weaknesses.
- Mayhem Mode: Endgame difficulty levels that can be used in the relevant playthrough. Enemies become substantially tougher; higher Mayhem drops can gain stronger weapon damage. In Mayhem, the TVHM-style elemental chart applies even if you launched Mayhem while in Normal.
The official Mayhem 2.0 announcement describes stronger weapon drops at higher tiers, challenge modifiers and special gear unlocked at designated Mayhem thresholds.
What does "Mayhem 10" on a weapon mean?
A gun’s Mayhem label describes a damage-scaling tier on that dropped weapon, not the level of your character. A level-72, Mayhem-10 copy can be much stronger than an otherwise equivalent level-72 copy with no Mayhem scaling.
Community references describe the weapon-scaling pattern approximately as 1.09^M, where M is the Mayhem weapon level. At Mayhem 10, this is about 2.37 times the non-Mayhem weapon base damage for an otherwise equivalent roll. As with ordinary levels, card rounding, parts, elemental versions and unique behavior can obscure exact comparisons. The Mayhem mechanics reference documents this equivalence.
A useful way to think about a level-72 Mayhem-10 gun is that its raw weapon damage has ten extra level-like steps. Do not interpret this to mean every enemy or skill treats the weapon as a literal level-82 object.
Does Mayhem affect grenades, melee, skills and other gear?
Yes, but not by applying the same weapon formula to every item. The post-Mayhem updates extended scaling to grenades and certain non-weapon damage sources, including action skills, pets, melee and other abilities. Shields, class mods and artifacts do not simply acquire a Mayhem weapon-damage tier in their item cards. Some of their damaging effects and certain character skills interact with Mayhem through their own scaling rules.
That means an endgame weapon guide cannot treat a gun in isolation. A build may rely on gun damage, grenade damage, action-skill damage, melee scaling or a combination, and the categories scale differently.
Mayhem 10 versus Mayhem 11
Mayhem 11 provides Mayhem-10-strength gear without Mayhem 10’s active gameplay modifiers. It is not a separate "Mayhem 11 gun" tier. The original November 2020 patch notes explicitly describe Mayhem 11 as a modifier-free copy of Mayhem 10 and say it drops Mayhem 10 gear.
Reward-rate caveat: The original developer note says that the amount and quality of world drops are reduced on Mayhem 11. Players subsequently reported that the advertised penalty was not functioning in the way the menu implied. We do not present a precise current M10-versus-M11 loot-rate difference as independently established. For an individual dedicated item, source eligibility and whether that source has a dedicated drop chance are more useful questions than the Mayhem 11 menu’s broad reward language.
Mayhem-exclusive and higher-tier weapons
Some special Legendaries have eligibility thresholds. For example, the Monarch and Kaoson are associated with the Mayhem 6-and-above loot tier and specific sources. You must meet the weapon’s stated eligibility requirement; increasing Mayhem cannot cause an item to drop from an unrelated activity or solve a missing DLC license.
The difference between upgrading Mayhem gear and optimizing a build
An M10 gun can still perform badly if it is the wrong element, has poor parts, misses frequently or lacks useful synergy. Endgame success often comes from multiplying several different damage systems: card damage, relevant gun bonuses, splash, critical, elemental, Anointment and other effects, rather than merely reaching the highest Mayhem label.
If you struggle at high Mayhem, diagnose the problem:
- Is your gun actually Mayhem-scaled to the tier you are playing?
- Is its element appropriate for the enemy’s health bar?
- Are you using its unique effect correctly?
- Are your skill tree, class mod, artifact, shield and Anointments supporting the same damage plan?
- Is your actual hit rate or ammo economy collapsing under tougher enemies?
- Are Mayhem modifiers interfering with the build, and would M11 remove that issue?
The actual BL3 damage calculation
The formulas above are for quick gun comparison. The full BL3 damage calculation uses several categories of bonuses. Two bonuses that both say "damage" in plain English may be added within one category, multiplied across separate categories, or applied only to part of an attack.
A commonly cited community-derived overview is:
Gun hit = Normal hit x Splash x special multipliers x Critical x Guardian x Elemental x other applicable factors
This is a schematic, not an exact universal copy-paste equation. Different attacks omit categories, and extra projectiles, bonus elements, melee-classified shots, reload throws and delayed explosions have their own pipelines. The detailed BL3 damage-formula research by Prismatic describes these categories and the exceptions.
Additive versus multiplicative: Why 30% is not always 30%
If two buffs belong to the same category, they often add within that category. If they belong to different categories, their resulting multipliers can multiply together.
Simplified illustrative example: A 1,000-damage gun with a 30% generic gun-damage bonus and a 25% bonus from a separate applicable weapon-type category might deliver:
1,000 x (1 + 0.30) x (1 + 0.25) = 1,625
If it then lands a noncritical fire attack against flesh on TVHM, the 175% health-type multiplier yields:
1,625 x 1.75 = 2,843.75
This assumes no additional bonuses, enemy defenses, rounding or unusual weapon mechanics. It is a worked example of separate damage categories, not a full simulation of a particular build. Simply writing 1,000 x (1 + .30 + .25 + .75) would lose the distinction between bonus categories.
Where critical damage fits
A normal weak-point critical starts with a baseline critical multiplier, then may receive different bonus types from the weapon, sniper class, manufacturer, skill tree, equipment or Anointment. For exact min-maxing, refer to the tested BL3 critical-hit formula, including its treatment of FL4K’s special abilities and conditional exceptions.
Do not multiply a listed +critical hit damage bonus into all body shots. Nor should you assume an automatic critical from a special skill uses exactly the same logic as an ordinary enemy weak-point hit.
Bonus elemental damage is an extra damage component
Some skills and Anointments add bonus elemental damage to an attack. This is not necessarily an upgrade to the original gun’s card element. It may be calculated as another damage component using the bonus element’s own matchups. A cryo gun with bonus incendiary damage is not simply "a cryo gun with a bigger cryo multiplier."
Community calculations also distinguish bonus elemental effects from the original attack’s splash and weapon-type categories in important cases. That is why blindly multiplying every Anointment percentage by the top card number produces bad estimates. The bonus-element analysis examines many of these interactions.
The practical lesson from the complicated formula
You do not have to solve the full damage engine every time you pick up a gun. Instead, ask whether a new item provides a new useful category of bonus or only adds more of one you already have. A small relevant multiplier in a separate category can outperform a large increase added to an existing, heavily boosted category.
For routine decisions, the fastest reliable method remains: compare equivalent weapons, check the target’s health type, inspect the unusual effect and then test under controlled conditions.
How Amara, FL4K, Moze and Zane change weapon value
The same gun can have very different performance on different Vault Hunters. Their skill trees and class mods change critical hits, gun bonuses, elemental damage, splash interactions, reloads, magazine size, fire rate, speed and special ability uptime.
| Vault Hunter | Common weapon-related strengths | What to evaluate |
|---|---|---|
| Amara | Elemental amplification, status interactions, splash and melee synergies | Element matching, extra damage components, crowd effects and whether the weapon deals melee or gun damage |
| FL4K | Critical-hit effects, high-impact shots, skills triggered by crits and pet interactions | Pellet/projectile count, crit reliability, precision and how frequently skills trigger |
| Moze | Splash damage, ammunition regeneration, large magazines and Iron Bear/Iron Cub interaction | Ammo per shot, splash classification, sustained uptime and applicable Mayhem scaling |
| Zane | Movement-linked bonuses, accuracy/handling, kill skills, clone/drone/shoulder-cannon interactions | Whether the weapon remains controllable while moving and how its bonuses trigger |
These are tendencies, not mandatory builds. Each Vault Hunter has multiple viable styles and, with the relevant Designer’s Cut content, access to a fourth skill tree. Character-specific exact skill values are best checked in a maintained Amara, FL4K, Moze or Zane skill-tree reference.
Why projectile count can matter beyond damage
Multiple projectiles create additional opportunities to hit critical zones and potentially trigger effects that respond to hitting, critting or applying status. However, not every skill or Anointment triggers independently from every pellet. Internal cooldowns, attack classifications and special cases matter. Never assume eight pellets guarantee eight procs just because eight numbers appeared.
Why ammo regeneration changes the best roll
A magazine that would be mediocre without replenishment may become an excellent sustained-fire weapon on a build that regenerates ammunition. Conversely, a roll that uses extra ammo per trigger can make an otherwise strong weapon hard to sustain. The ordinary DPS table is therefore a starting point, not a final ranking across different characters.
Why weapon-category bonuses matter
A class mod might raise gun damage, specific firearm-type damage, manufacturer damage, critical damage, splash damage or a stat such as magazine size. Those bonuses may fall into different categories in the damage calculation. A roll that looks smaller on paper can outperform a larger generic bonus because of where it enters the formula.
Anointments explained
An Anointment is an additional item effect, usually conditional, attached to eligible higher-level equipment. It can improve gun damage, elemental damage, criticals, action-skill interactions, ammunition or other capabilities when its trigger is met.
What activates an Anointment?
Common trigger categories include:
| Trigger concept | What it means in practice | What to check |
|---|---|---|
| On Action Skill End (ASE) | Effect begins when a qualifying action skill ends | Does your skill actually trigger an end event and how long is the bonus? |
| On Action Skill Start (ASS) | Effect starts when you activate a qualifying skill | Is this a shield effect, gun effect or other category? |
| While Action Skill Active (ASA) | Condition remains relevant during an active skill | How long is your skill active? |
| Next two magazines | Conditional damage can persist through specified magazine behavior | What constitutes the magazine change on this gun? |
| Consecutive hits | Effect rewards sustained successful hits | What resets stacks or interrupts the hit chain? |
| After a kill, reload, grenade throw or movement action | Trigger and duration vary by roll | Can your playstyle actually maintain it? |
| Vault Hunter-specific | Tied to a named class ability | Does your current character/skill use it? |
This is a guide to effect types, not a list of every obsolete and current exact roll. Read your actual item text; specific numeric values and conditions have changed during BL3’s balance history.
Terror Anointments and seasonal-event exceptions
Terror is a distinct event-linked status and Anointment mechanic associated with the Bloody Harvest content. Some Terror equipment creates or rewards stacks of Terror, while ordinary unsupported weapon comparisons may overlook those conditional bonuses. A Terror effect is not automatically active just because the item says it has one; check how the build generates Terror and what changes while stacks are present.
Older guides can describe temporary versions of event drops as though they were the entire modern system. Read the current in-game Anointment wording and active event settings instead. The official November 2019 Bloody Harvest hotfix notes show that Terror Anointment drop rules were adjusted after launch.
Only the held gun’s weapon Anointment generally applies
A common misconception is that Anointments on all four equipped guns stack all the time. They do not. For normal weapon Anointments, the effect is associated with the gun you are currently holding. Switching away generally ends its gun Anointment effect. The equipped shield and grenade mod can also contribute their own applicable Anointments. The Anointment reference documents the held-weapon distinction and major stacking limits.
You can use Anointments from different equipment slots together when they are compatible, but do not assume identical bonuses stack. For example, same-element bonus Anointments on shield and grenade do not simply add together indefinitely under the documented rules. Specific timing and category restrictions must be checked.
The difference between "on the weapon" and "affects the weapon"
A shield Anointment may increase the damage of the gun you hold even though the shield itself is not a gun. A weapon Anointment may affect an action skill instead of providing ordinary firearm damage. Distinguish:
- Where the effect is located: weapon, shield or grenade mod.
- What activates it: action skill, critical hit, kill, reload or another condition.
- What it modifies: gun damage, bonus element, shield effect, skill damage or other category.
- How long it lasts: a fixed time, while a state remains active, or a defined number of magazines/events.
Can you change the Anointment without farming a new gun?
Yes, on eligible Anointed gear. Crazy Earl’s Reroll Machine on Sanctuary III replaces the existing Anointment at a cost of 250 Eridium per roll in the unmodified game. It is randomized and there is no undo button after accepting the new roll. It does not change the level, Mayhem level, elemental part or normal weapon components.
The official 2K announcement confirms the addition of the free reroll machine in April 2021, and the Director’s Cut patch coverage documents its 250-Eridium cost.
Practical strategy: Prioritize finding the right weapon and desirable parts/element first; then reroll a genuinely useful copy. Spending thousands of Eridium on a poor roll because it happens to be orange is rarely the best use of your time.
Shields, grenades, class mods, artifacts and Guardian Rank
These are not all guns, but their bonuses can determine whether a gun performs well. A comprehensive weapon guide must include the interactions while keeping the categories distinct.
Shields: Survival and offensive bonuses
A shield can provide absorb effects, amplifying shots (often called amp damage), projected protection, resistance, bonuses while full or depleted, and a separate Anointment. Some shields create offensive effects that are central to a gun build. Not all bonuses are automatically on, and an amp shield may exchange shield capacity for stronger attacks.
Grenade mods: The other equippable weapon system
Grenade mods combine delivery and payload behavior. Common delivery concepts include:
- Lobbed or longbow: Normal thrown arc versus teleport-like long-range placement.
- Homing or tracking: Seeks a target under its relevant rules.
- MIRV, divider or bouncing: Produces additional grenade objects or impacts.
- Singularity: Pulls targets or changes their position.
- Transfusion: Returns health or shields under qualifying hits.
- Elemental and damage-over-time: Adds status or elemental pressure.
The exact result depends on parts and the named grenade’s unique behavior. An apparently small grenade can deal damage through repeated bounces or child explosions. Grenade mods can also carry Anointments and receive Mayhem-dependent damage scaling, so they are not simply emergency consumables.
Class mods and artifacts
A class mod can improve skills and roll relevant passives such as weapon-type damage, critical damage, splash damage, magazine capacity or reload. An artifact can add different bonuses, mobility or conditional behaviors. A gun with a mediocre card may become exceptional when its damage category matches both items.
Class mods and artifacts are not Mayhem-tier weapons. Their passives and interaction with Mayhem-scaled attacks matter more than expecting a "Mayhem 10 artifact" damage label.
Guardian Rank and Guardian perks
After campaign progression unlocks Guardian Rank, its bonuses and perks can change critical damage, gun damage, reload behavior, excess-damage transfer and other combat variables. A build demonstration using maxed Guardian perks can produce results that a fresh campaign character cannot reproduce. When testing or comparing builds, say whether Guardian bonuses are active.
Where Borderlands 3 weapons come from
Different loot sources follow different rules. Understanding them saves considerably more time than farming indiscriminately.
| Source | Typical purpose | Restriction or caveat |
|---|---|---|
| Ordinary enemies and random loot | General progression and world drops | Not a reliable way to target every specific item |
| Dedicated bosses/unique enemies | Farm an item attached to that source’s dedicated pool | Some items require Mayhem eligibility, DLC or special modes |
| Mission rewards | Specific unique equipment | Reward level can be tied to when acquired; some are one-time per playthrough |
| Chests and vending machines | Quick replacements and occasional high-value loot | Inventory pools and scaling depend on activity/mode |
| Maurice’s Black Market | Rotating selection of certain Legendaries | Location and selection rotate; costs can be high |
| Eridian Fabricator | Spend Eridium for generated weapons | Random output; not equivalent to dedicated farming |
| Golden Chest | Level-appropriate high-end gear | Requires a Golden Key |
| Diamond Armory | Timed choice of high-end gear | Requires a Diamond Key; Vault Cards are Director’s Cut content |
| Events | Event-related Legendaries and cosmetics | Seasonal/event settings and content-specific access |
| DLC, Arms Race, Vault Cards | Exclusive loot and alternate acquisition loops | Requires the applicable content license or activity |
| Takedowns, Trials, Slaughters | High-level combat and dedicated rewards | Certain drops change with difficulty or optional challenge modes |
2K’s dedicated-loot update describes giving bosses dedicated pools and adding a Sanctuary III target dummy. The Diamond Keys announcement describes the Diamond Armory and its relation to Director’s Cut/Vault Cards.
World drops versus dedicated drops
A world drop can appear from more general loot sources. A dedicated drop is tied to a specific enemy, chest or activity. Some weapons can appear through both paths, while others have restrictions. A higher Mayhem level can change general loot opportunities, but it does not make every named item eligible everywhere. Community testing generally distinguishes world-drop modifiers from fixed dedicated-pool chances; see the community loot-resource discussion.
How to check the best source for a particular gun
Find the exact weapon in the Lootlemon BL3 database, then inspect its content label, drop source, eligibility, mode requirement and variants. A target may be possible to farm only at Mayhem 6+, inside an add-on activity, or after unlocking a particular location. A general internet search for "best gun location" can be obsolete because drops and balancing changed after the 2019 launch.
The six numbered DLC categories are not interchangeable
The four major story add-ons are Moxxi’s Heist of the Handsome Jackpot, Guns, Love, and Tentacles, Bounty of Blood, and Psycho Krieg and the Fantastic Fustercluck. Designer’s Cut adds Arms Race and fourth skill trees; Director’s Cut adds features including Vault Cards, the Diamond Armory and other content. These belong to different purchases/bundles, and a base-game player should not be told to farm a weapon from an expansion they do not own.
Arms Race changes how you choose weapons
Arms Race, introduced with Designer’s Cut, is especially useful for understanding raw weapon performance because its activity restricts access to the ordinary character skill/build toolkit. In that environment, weapon usability, elements, ammunition and quick evaluation can matter more than the elaborate Anointment synergy of a finished endgame build. Loot extraction mechanics also matter when trying to keep an item found there.
Events, True Trials and difficulty-dependent sources
BL3’s seasonal events can be toggled from the menu after the relevant updates. A source’s drop behavior may depend on whether a special challenge mode, event or boss difficulty is active. "This boss drops X" is incomplete if a mode prerequisite is omitted. Check the item source page before concluding that 20 unsuccessful runs indicate a bug.
Inventory, storage, weapon slots and auto-selling
You can understand every damage formula in the game and still waste time if your backpack becomes an unsorted collection of obsolete loot. Inventory management is part of evaluating weapons, not a separate chore.
When do you get all four weapon slots?
You begin the story with fewer than four available weapon slots. Additional slots unlock through campaign progress, not because you reached a particular character level or purchased a storage upgrade. Once unlocked, four equipped weapons let you carry complementary damage types and roles. Four equipped guns do not mean that all four weapon Anointments are active at once. The relevant weapon Anointment normally belongs to the gun you are holding.
A practical four-slot arrangement for a general-purpose playthrough is:
| Slot role | What it solves | Possible alternative |
|---|---|---|
| Reliable primary gun | Ordinary enemies at your preferred range | High-ammo-efficiency rifle or SMG |
| Health-bar specialist | Shields, armor or flesh your primary gun handles poorly | A dual-element Maliwan gun |
| Burst or precision gun | Badasses, distant targets, weak points and short exposure windows | Shotgun or sniper |
| Crowd-control or utility gun | Groups, flying targets, splash, status effects or emergency recovery | A launcher or unusual Legendary |
These are roles, not rules that every build must obey. Some builds benefit from several guns of one category, while others use one main weapon and carry utility guns. The best loadout is the one that consistently solves the encounters you actually face.
Backpack, bank and SDUs
Storage Deck Upgrades (SDUs) are purchased from Marcus on Sanctuary III using in-game money. Distinguish:
- Backpack SDUs: More space to carry unequipped gear.
- Bank SDUs: More shared storage space across your characters on the same profile.
- Ammunition SDUs: More reserve ammunition for each gun category, plus grenades.
- Lost Loot SDUs: More capacity in the recovery machine under eligible loot-mode rules.
The bank is the safest place for a genuinely useful alternative roll, a lower-level gun intended for another character, a hard-to-replace mission reward or gear used by a different build. Unlike a weapon-equipped slot, the bank is storage, not an always-active effect. The Borderlands bank reference explains the shared BL3 bank and SDU upgrades.
What should you actually bank? A specific useful elemental roll, an unusually strong part combination, a future-level gun, a build-enabling unique or an item with difficult acquisition. Do not bank every orange item merely because it is orange; the cost is storage, sorting time and losing track of what matters.
Favorites, trash and selling
Mark a weapon as Favorite if you are actively using it or intend to keep it for comparison. Mark routine unwanted loot as Trash and sell it at a vending machine. When evaluating a possible upgrade, compare it with the weapon occupying the same combat role rather than sorting all weapons by price or score.
A useful inventory pass takes three questions:
- Does this gun outperform something in my current loadout in an actual role?
- Does it provide a special capability or damage type my loadout lacks?
- Is it rare or inconvenient enough to obtain that I should bank it for a specific future build?
If all three answers are no, selling it is reasonable. This remains true for many Legendaries.
Auto-sell: A useful feature with an important warning
An August 8, 2024 Borderlands 3 update added the option to automatically sell picked-up gear at or below a selected rarity threshold. This is especially helpful after you stop using ordinary low-rarity drops. However, the official update notes warn that mission reward items can be sold automatically when the option is enabled. Disable auto-sell before completing a mission whose reward you want to keep. Cosmetics are excluded from the system’s ordinary gear auto-sell behavior.
The same update introduced the ability, for qualifying players who have completed the game and have at least one max-level character, to create another max-level character from the main menu. Do not assume that option is available to a brand-new player.
The Lost Loot machine and co-op loot modes
The Lost Loot machine on Sanctuary III can recover eligible high-value drops you left behind or could not reach, but it is not an unlimited insurance policy. Its capacity can fill, and its behavior depends on your loot mode.
- Cooperation: Players receive instanced loot with level scaling appropriate to them. Lost Loot can function for eligible items in this mode.
- Coopetition: The party sees shared loot and can compete over pickups. Do not expect the Lost Loot machine to operate as it does in Cooperation.
In multiplayer, decide your loot mode before farming a rare item. A drop that exists for one player in an instanced loot pool should not be confused with a permanently transferable party-wide entitlement. Trading and in-game mail can help players share actual items, subject to platform and session support.
Can you upgrade a gun you already own to a higher level?
Not through a standard weapon-level upgrade station in the unmodified game. You cannot take an old level-25 Hellwalker to Marcus and turn it into the same level-72 item by paying money. You typically need to acquire an appropriately leveled new copy. Crazy Earl’s Anointment reroll machine changes a qualifying Anointment, not the gun’s item level, Mayhem tier or fundamental part roll.
How to farm weapons efficiently without wasting time
A farming recommendation should begin with the question which version of the gun do you need, and why? A great weapon with the wrong element, weak parts, poor level or unusable Anointment may require another copy or a reroll.
The useful farming checklist
- Confirm access. Is the gun base-game, DLC-exclusive, Arms Race, Vault Card, event-specific or gated behind Mayhem 6+?
- Confirm the current dedicated source. Check a maintained weapon record rather than an undated clip from 2019.
- Set the appropriate character and Mayhem level. At endgame, a convenient Mayhem 11 run can yield Mayhem 10-tier gear without active Mayhem modifiers.
- Choose a fast and repeatable route. Your kills per minute can matter more than a higher theoretical reward bonus accompanied by slow or risky fights.
- Know which roll matters. Element, projectile count, major parts, alternate mode and Anointment may not be equally important for your build.
- Use the reroll machine when appropriate. If the base weapon is already excellent, rerolling its Anointment may be more efficient than hunting for an identical copy.
- Stop when the difference is no longer meaningful. There is little benefit to spending hours for a tiny numerical upgrade that does not change the number of shots needed to defeat your intended target.
Dedicated drop odds and world-drop odds are different questions
A boss can have both a dedicated loot pool and an opportunity to generate world drops. Increasing general world-drop opportunities does not necessarily increase every item in its dedicated pool by the same factor. Similarly, Luck should not be treated as a magic percentage increase to the probability of every desired Legendary; published explanations of BL3 Luck are limited and do not support that simple conclusion.
If a source has a fixed dedicated-drop probability p per independent kill, the idealized chance of seeing it at least once in n kills is:
P(at least one drop) = 1 - (1 - p)^n
For example, with an illustrative 10% independent drop rate, the probability of getting at least one copy in ten kills is about 1 - 0.9^10 = 65.1%. That does not mean it is guaranteed by the tenth kill. And getting the right element, parts and Anointment on the same drop may be substantially less likely. Use the current dedicated-drop rate for the actual weapon; 10% is only an example.
Loot sources worth distinguishing
- Boss and named-enemy farms: Consistent path and targeted loot pool, often requiring save-and-quit or activity resets.
- Slaughter arenas and Takedowns: Useful for concentrated combat, multiple drops or mode-specific loot, but completion time matters.
- Trials and True Trials: Different challenge settings and potentially different rewards; verify the current activity mode.
- Arms Race: You must survive and extract eligible finds to keep them; normal build advantages are constrained inside the activity.
- Golden Keys and Diamond Keys: Useful loot access, but not a substitute for researching a named gun’s dedicated source.
- Maurice’s Black Market: Rotating stock and location; verify the current rotation rather than relying on an old screenshot.
- Mission rewards: Consider reward level and one-time access before accepting, completing or automatically selling them.
The exact drop location for all 300-plus named weapons would be a separate database project, and it changes the reader’s task from learning the system to looking up an item. For live item-by-item locations, the Lootlemon weapons database is a better companion than an enormous, duplicative table inside this explainer.
Practical gun comparisons: Why the better-looking card can lose
The most useful test of the system is whether it explains outcomes that initially seem contradictory. The first three comparisons below are deliberately hypothetical arithmetic; named-gun examples afterward describe documented mechanics, not claims that one build has the universally highest DPS.
Example 1: A 250 x 8 shotgun versus a 1,000 rifle
The shotgun promises 2,000 total listed projectile damage if all eight pellets connect. The rifle delivers 1,000 with one successful hit. At close range, the shotgun can have a clear base-damage advantage. At a distance where only three pellets reach the target, the shotgun delivers 250 x 3 = 750 before other modifiers, while the rifle can still deliver 1,000 if its single shot lands.
Lesson: Projectile count is an opportunity for damage, not a guarantee. The distance to the enemy changes which card is stronger.
Example 2: Fast gun versus quick-reloading gun
Imagine a 300-damage, eight-shots-per-second gun with 16 rounds and a two-second reload. Compare it with a 400-damage, five-shots-per-second gun with 25 rounds and a one-second reload. Using the simplified full-cycle model in the DPS section, the first delivers 2,400 burst DPS but about 1,200 sustained DPS; the second delivers 2,000 burst DPS but about 1,667 sustained DPS.
Lesson: A high fire rate is not the same as good sustained performance. Encounter length determines which rate matters.
Example 3: A bigger number with the wrong element
Suppose a fictional non-elemental gun displays 1,000 base damage and a corrosive alternative displays 900. Against armor in Normal mode, using the documented baseline multipliers, the non-elemental attack yields about 1,000 x 0.80 = 800 and the corrosive attack about 900 x 1.50 = 1,350 before other bonuses. The apparently weaker card delivers substantially more damage to that health type.
This is an illustrative single-hit comparison, not a claim that the two guns have identical projectiles, fire rate, character bonuses or status behavior.
Lesson: Enemy type can outweigh a moderate difference in card damage.
Example 4: The Monarch in regular versus bipod mode
The Vladof Monarch is an excellent example of a weapon whose firing mode changes the comparison. Its alternate bipod mode doubles the number of projectiles relative to its normal mode, but restricts movement. In an encounter where you can stand still and keep a large target in your sights, bipod mode can deliver exceptional pressure. Against mobile enemies or dangerous incoming fire, being slowed or constrained can erase some of that theoretical advantage.
Lesson: The best damage mode is not necessarily the safest or fastest way to finish the fight.
Example 5: The Kaoson versus a weapon that only has a direct hit
The Kaoson attaches projectiles that produce subsequent explosions. Evaluating the weapon from its direct bullet damage alone omits a major part of its output and possible splash interactions. The timing also matters: a target may move or die before every delayed event contributes.
Lesson: For special weapons, count attack events, not just initial projectile damage.
Example 6: The Face-puncher and an ordinary shotgun
The Face-puncher looks like a shotgun but delivers damage using melee damage rules. It interacts with melee-oriented effects and does not score ordinary critical hits. Treating it as a standard shotgun in a generic gun-DPS calculation yields the wrong build advice.
Lesson: A weapon’s equipment category does not always identify its damage category.
Example 7: A low-level Hellwalker versus a higher-level ordinary gun
The Hellwalker is a fast, powerful Jakobs shotgun with a distinctive fixed pellet arrangement and a one-shot magazine. During the story, a well-rolled Legendary can outperform higher-level ordinary drops because its unique behavior is unusually effective. Eventually, however, the old weapon’s lower level becomes a material disadvantage. Refarm or replace it; rarity does not permanently exempt gear from progression.
Lesson: Powerful unique mechanics can buy a weapon more time, but they do not abolish level scaling.
Example 8: A gun that is excellent on Moze but awkward on another build
A splash-oriented, rapid-firing weapon may benefit enormously from a Moze build centered on splash, ammunition recovery and magazine uptime. The same gun on a Vault Hunter without those bonuses may consume ammunition too quickly or need frequent reloads. Conversely, a precision Jakobs weapon may excel on a build that rewards frequent critical hits.
Lesson: Comparisons without the character and build are incomplete.
Example 9: A Mayhem 10 gun versus the same named gun at Mayhem 0
Two same-level, same-name weapons can differ substantially if one is Mayhem-scaled and the other is not. A Mayhem 10 item generally has a higher listed damage baseline than an otherwise equivalent non-Mayhem copy. You still need to examine elements, parts, projectiles and Anointments. Mayhem-scaled damage is part of the weapon’s card damage; do not apply another Mayhem bonus multiplier after reading the card.
Lesson: Compare like for like when judging a particular roll or farming improvement.
Example 10: Plasma Coil burst timing versus average DPS
The Maliwan Plasma Coil fires in a distinct burst pattern after charging. Its powerful output cannot be interpreted solely by multiplying its card’s damage by the listed Fire Rate without understanding how the burst and delay are implemented. It is also Designer’s Cut / Arms Race content, so recommending it to a base-game player without qualification would be misleading.
Lesson: Damage delivery timing and ownership requirements are part of an honest recommendation.
How to test two guns in your own game
You do not need to reverse-engineer every hidden formula to run a fair comparison, but you do need to control the important conditions. BL3 has a target dummy on Sanctuary III following post-launch updates, and live enemy testing remains important because the dummy cannot reproduce every resistance, immunity, critical location or special effect.
A repeatable field test
- Record the versions: Weapon name, level, Mayhem level, parts/element, Anointment and any DLC/mode restrictions.
- Hold the build constant: Same character, skill allocation, shield, class mod, artifact, grenade mod and Guardian bonuses. Record any conditional buff already running.
- Compare ordinary hits first: Avoid critical spots and unusual status effects when testing a narrow baseline question, unless that is the mechanic being evaluated.
- Test a known weak point separately: Compare critical interactions only when both weapons can legitimately score the same type of hit.
- Use the correct enemy health type: Flesh, shield and armor multipliers can completely change conclusions.
- Observe the firing cycle: Count shots per magazine, ammo consumed per attack, charge delay, reload and periods when an ability prevents or encourages firing.
- Repeat enough times: Status effects, movement and proc chances vary. A single lucky ricochet or status application is not a reliable average.
- Make the right decision: A weapon worth keeping may be the one that performs reliably in your actual gameplay, not the one with the highest possible recorded screenshot number.
A small comparison log
| Field | Weapon A | Weapon B |
|---|---|---|
| Name, level and Mayhem tier | Record | Record |
| Damage, projectiles and ammo/shot | Record | Record |
| Element and enemy health bar | Record | Record |
| Fire rate, magazine and reload | Record | Record |
| Critical / splash / secondary effects | Record | Record |
| Build and Anointments active | Record | Record |
| Shots or seconds to kill target | Repeat | Repeat |
| Reliability, range and ammo spent | Note | Note |
A test with these conditions stated is far more useful than a naked claim that a gun has ‘one billion DPS.’
The keep, equip, bank, sell or farm decision tree
Use the following method after a notable drop:
- Can I equip it now? If no, bank it only if it will serve a future build or character. Otherwise it occupies space without present value.
- What is its special mechanic? For red-text and unusual guns, look up the named ability before judging the visible damage.
- Which existing loadout role would it replace? A gun is valuable if it solves a problem better or adds useful elemental/utility coverage.
- Is its damage appropriate to my level and Mayhem tier? Do not let Item Score obscure this comparison.
- Does the firing behavior fit my playstyle and skills? Count actual hits, downtime, ammo usage and conditional bonuses.
- Can another copy be farmed easily? Bank unusually useful or scarce rolls. Sell redundant common rolls even if they are Legendary.
- Would a different Anointment make this the right gun? Consider rerolling a great underlying weapon, not throwing Eridium at a poor base roll.
Final rule: Equip the gun that solves your current combat problem. Bank gear with a specific future use. Sell gear that does neither. Farm another copy only when the improvement is consequential enough to justify the time.
Frequently asked Borderlands 3 weapon questions
The answers below are deliberately short. Follow the linked sections earlier in the guide when you need calculations, conditions or examples.
Is the gun with the highest Damage always best?
No. Compare projectiles, accuracy, fire rate, reloads, element, special effects and build synergy. The Damage field is not the final damage number against every enemy.
What does 400 x 5 mean on a shotgun?
Typically five listed projectiles dealing 400 card damage apiece: 2,000 total before other effects if all five land. It does not necessarily mean five ammunition units were consumed. Read ammo/shot and unique behavior separately.
Are the listed +Weapon Damage percentages already included?
Ordinarily, yes. The weapon card’s main damage number generally already reflects its generated weapon-damage modifiers. Do not apply that line a second time. A critical, conditional, splash, elemental or Anointment bonus may work differently, so always identify what the effect actually modifies.
Does 90% Accuracy mean nine of ten bullets will hit?
No. It is not a calibrated hit-probability percentage. Range, target size, movement, spread, recoil and projectile speed determine the fraction of attacks that land.
What is the difference between Accuracy and Handling?
Accuracy concerns spread, while Handling relates to weapon control such as recoil and sway. A gun can have a narrow shot spread but still be awkward to keep on target during prolonged fire.
Why does my weapon seem to get more accurate while shooting?
That is a signature feature of many Hyperion firearms. Their accuracy can improve through sustained firing. Not every weapon in BL3 behaves that way.
Is Fire Rate the same thing as DPS?
No. Fire Rate counts firing events per second; DPS depends on damage per event, projectile count, how the attack is delivered and whether the weapon must reload, cool or charge. Actual damage delivered also depends on the enemy and your accuracy.
Why does a gun that looks weaker kill enemies faster?
It might hit more often, have a stronger element against that health bar, score more criticals, include hidden secondary damage, bypass substantial downtime, or trigger more of your build’s bonuses. Compare the whole attack and target, not only one card field.
What does Handling do for a sniper rifle?
It helps determine how controllable the weapon feels, including recoil and sway. It can make repeated weak-point hits more reliable, but it is not an automatic sniper-damage boost.
Which is better: a pistol, SMG, assault rifle, shotgun, sniper or launcher?
There is no universally best class. Each uses different ammunition and tends toward different tradeoffs. A pistol can be a serious primary damage weapon. A sniper can fire multiple unusual projectiles. A shotgun can use melee damage. Choose based on the actual gun and encounter.
What do the gun manufacturers actually do?
They define recognizable operating tendencies: Atlas tracking, COV heat, Dahl firing modes, Hyperion improving accuracy, Jakobs critical ricochets, Maliwan elemental specialization, Tediore throw-reloads, Torgue splash/stickies and Vladof rapid fire/attachments. Individual Legendary effects can override ordinary expectations.
Which elemental gun should I use against blue, red and yellow bars?
Shock is generally strongest against blue shields, Incendiary against red flesh, and Corrosive against yellow armor. Cryo and Radiation provide other matchups and effects. The exact multipliers depend on Normal versus TVHM/Mayhem, so consult the two tables above.
Is non-elemental damage ever useful?
Yes. It offers a consistent baseline and can be useful when you do not want an element’s resistance penalty, particularly with a strong weapon or powerful build synergy. It is not the optimal element for every specific health-bar matchup.
Is Radiation just another version of Shock?
No. Both can be useful around shields, especially in TVHM/Mayhem, but Radiation adds an aura and death-explosion/spread behavior. Shock specializes in stripping shields. Their listed multipliers and tactical roles differ.
How is Cryo different from Incendiary or Corrosive?
Cryo primarily slows and can freeze rather than applying the same kind of ordinary elemental damage-over-time effect. Cryo Efficiency affects freeze progress, and frozen targets take increased melee damage. Freezing rules have exceptions for bosses and resistant targets.
What does a status-effect chance of 20% mean?
It is an indication of the weapon’s application chance under its relevant effect rules, not a promise that exactly one in every five trigger pulls will produce an independent successful proc. Multiple pellets, repeated hits, internal rules, special effects and enemy immunities can complicate that interpretation.
Is an orange Legendary automatically better than a purple Epic?
No. Legendary rarity usually signals unique effects, not guaranteed superiority for the particular level, enemy, range or build. An up-to-date purple can outperform an old or awkward Legendary.
What does Item Score mean, and should I sort by it?
It is a broad in-game rating rather than a reliable measure of damage or combat usefulness. Sorting by Item Score alone will routinely produce bad decisions.
Can I level up my favorite gun?
There is no ordinary BL3 weapon-level upgrade station. Find another copy at the appropriate level. Rerolling changes eligible Anointments but does not replace the weapon’s base level or parts.
What is a god roll?
It is an especially desirable combination of parts, element, projectile behavior and sometimes Anointment for a specific build or task. Different builds can prefer different rolls of the same Legendary. The label is a community judgment, not a universal in-game quality tier.
Can I remove bad weapon parts or swap the barrel?
Not through a standard in-game weapon crafting system. The inspection screen shows parts, but it is not a workshop for replacing them. To obtain a different part combination, you usually need another drop.
Is red text the same as an Anointment?
No. Red text signals a unique weapon’s intrinsic special effect. An Anointment is a separate conditional item bonus that can vary between eligible copies and can sometimes be rerolled.
Do my other three equipped guns give me their Anointment bonuses?
Generally, no. Normal weapon Anointments are tied to the held weapon. Your equipped shield and grenade mod can have relevant bonuses of their own. Do not count bonuses from all four stored weapon slots simultaneously.
Can I put the same elemental Anointment on the gun, shield and grenade and stack everything?
Not indiscriminately. Compatibility and stacking restrictions apply. Different conditions or damage categories may interact, but identical bonuses on different equipment slots are not automatically all independent multipliers. Check the exact current effect and testing before designing a build around stacking.
What does On Action Skill End mean?
It refers to a trigger associated with an action skill ending. Its usefulness depends on the character, selected skill, effect duration and whether the action can actually produce the intended trigger. Do not infer that a bonus is always active merely because the equipment is Anointed.
What is the maximum character level in Borderlands 3?
72 in the unmodified game, following the official June 2021 update. Mayhem tier is a separate weapon/difficulty attribute.
What is the strongest Mayhem-level weapon?
For a particular otherwise identical roll, Mayhem 10 provides the top weapon damage tier. This does not mean every M10 gun is stronger than every lower-tier named gun in every situation, and it does not mean you must play with M10 modifiers to acquire the gear.
Does Mayhem 11 drop better guns than Mayhem 10?
No higher gun tier. Mayhem 11 drops Mayhem 10 gear, and has no active Mayhem modifiers. The original developer notes described a world-drop reward tradeoff, but the current practical effect of the advertised penalty has been disputed and should not be stated as a precise verified rate.
Is True Vault Hunter Mode necessary to farm strong guns?
No. Endgame Mayhem can be used without requiring a full TVHM replay for a top-tier Mayhem weapon. TVHM remains useful if you want its campaign replay or other differences. Mode-specific elemental rules still matter.
Do weapons consume one bullet for every projectile shown?
Not necessarily. Projectile count and ammunition cost are different. Some shotguns fire many pellets per shell; other weapons spend multiple ammo units per firing event. Inspect the actual gun or measure ammo consumed.
Why does my COV gun have no normal magazine size?
COV guns use reserve ammunition, heat and repair mechanics instead of a conventional detachable magazine and reload cycle. Their sustained performance depends on overheating and cooling, not simply the ordinary magazine/reload DPS formula.
Why does Tediore reload sometimes cause so much damage?
Reloading throws the weapon as an attack. The throw’s behavior varies by gun and can depend on ammunition remaining, tracking, bounce, explosions or additional child events. An early reload can be a deliberate offensive choice.
Are sniper-rifle critical hits always stronger than pistol critical hits?
Not automatically. Weapon families, critical bonuses, weak points, special effects, skills and parts differ. A given sniper rifle may excel at crits, but its weapon-class label alone does not guarantee the strongest final multiplier.
Are grenades, class mods and artifacts part of a gun build?
Yes, often decisively. Shields and grenade Anointments, class-mod passives, artifact bonuses, Guardian Rank and skills can amplify or change weapon behavior. They are separate equipment categories, so do not apply one gun scaling rule indiscriminately to all of them.
Do DLC guns work if I do not own the DLC?
Some guns are exclusive to an add-on or activity. You generally need the applicable content to access its ordinary source. Always check the item record before following a recommended farming route, and avoid assuming that all six major BL3 add-ons are included with the base game.
Is there a Pearlescent rarity tier in Borderlands 3?
The unmodified game’s normal weapon rarity progression tops out at Legendary (orange). Do not import the Pearlescent loot conventions of other Borderlands titles into BL3. A different Borderlands game’s loot changes do not retroactively change BL3’s rarity system.
How do I avoid selling a valuable mission reward accidentally?
Disable auto-sell by setting it to None before completing the mission. The August 2024 patch notes specifically warn that eligible mission rewards can be sold automatically by the rarity filter.
Which single gun should I farm first?
There is no universally correct answer without your character, level, available DLC, target Mayhem tier, preferred playstyle and current equipment. First identify which role your loadout struggles with, then find an accessible gun whose element and special behavior solve that role.
Glossary: Borderlands 3 weapons terminology
| Term | Meaning in this guide |
|---|---|
| ADS | Aim down sights; using the weapon’s sights or scope |
| Alternate fire | Manufacturer-specific second operating mode or attachment |
| Anointment | Conditional bonus available on eligible equipment |
| ASE / ASS / ASA | Action Skill End / Start / Active triggering shorthand |
| Armor | Yellow health-bar layer, generally weak to Corrosive |
| Base damage | A weapon’s starting attack value before relevant later modifiers |
| Bloom | Increased spread, commonly during continuous firing |
| Burst damage | Damage delivered within a brief firing window |
| Burst DPS | Damage per second while actively firing, before long-run downtime |
| Card damage | Damage shown on the weapon’s item card; already reflects normal item modifiers |
| Charge time | Delay required before a weapon or attack reaches its firing state |
| COV heat | Overheating/cooling behavior replacing a conventional magazine cycle |
| Critical hit | Hit on a valid enemy weak point using the game’s crit rules |
| Cryo Efficiency | Measure affecting accumulation of freeze against suitable targets |
| Damage bucket | Community term for a category of modifiers added together before multiplication with others |
| Dedicated drop | Loot attached to a particular source, activity or pool |
| DoT | Damage over time; repeated damage from relevant status effects |
| DPS | Damage per second; must specify burst, sustained, or a combat model |
| Element | Damage type such as Shock, Incendiary, Corrosive, Cryo or Radiation |
| Fire rate | Number of firing events per second in the relevant mode |
| Handling | Weapon control rating, including recoil/sway behavior |
| Hitscan | Projectile behavior treated as nearly instantaneous in common gaming language; not a universal BL3 gun label |
| Item Score | Approximate gear ranking, not an actual combat-damage estimate |
| Kinetic / non-elemental | Standard, untyped bullet damage for elemental-matchup purposes |
| Legendary | Orange-rarity gear, often with unique special effects |
| Magazine | Ammunition held before conventional reloading; not identical to shots per magazine |
| Mayhem tier | Endgame difficulty scaling; on qualifying dropped gear, a separate damage tier |
| MIRV | Grenade behavior that creates additional child grenades |
| Proc | An effect activating after a qualifying event such as a hit |
| Projectile count | Number of projectiles produced per listed firing event |
| Red text | Distinctive text associated with a named unique item’s special effect |
| Recoil | Aim movement after firing |
| Reroll | Replacing a qualifying item’s Anointment with a randomized new one |
| SDU | Storage Deck Upgrade: extra bank/backpack/ammunition capacity |
| Shield | Blue enemy-health layer, generally weak to Shock; also a player equipment slot |
| Splash | Area-of-effect damage that can apply separately from a direct impact |
| Status chance | Chance or parameter affecting a status application under relevant rules |
| Sustained DPS | Average output over an extended firing cycle, including relevant downtime |
| TVHM | True Vault Hunter Mode, BL3’s campaign replay mode |
| Underbarrel | Secondary weapon attachment, particularly associated with Vladof |
| World drop | A drop from a general eligible loot pool rather than solely a dedicated source |
Editorial methodology and accuracy notes
Game covered: Borderlands 3, not Borderlands 4. Review date: October 23, 2026. Current unmodified level cap used: 72. Endgame tiers discussed: Mayhem 1-11, with gear scaling up to Mayhem 10. Balance, loot availability, event behavior and user-modified games can depart from the circumstances documented here.
Evidence priority: Official 2K/Gearbox announcements for added features, modes and version history; specialist item databases for named-item behavior and loot requirements; credited community tests for damage-bucket formulas, elemental interactions and unusual weapon mechanics. Player experience can reveal missing edge cases, but is not treated as a universal rule without corroboration.
Original analysis in this page: The comparison framework, derived illustrative damage calculations, farming-probability example, decision tree and interpretation of combat tradeoffs are editorial synthesis. This article does not claim that sherafy.com performed original controlled in-game measurements of every weapon, part, status effect or Anointment. Named special effects are identified using published reference records.
Disputed numerical values: Historical fan-maintained elemental tables do not agree perfectly in every cell, particularly around Normal-mode Radiation against shields and some community-derived elemental values. For the published charts above, this guide follows the contemporaneous detailed Gearbox community testing where it resolves a conflict, marks remaining uncertainty instead of disguising it, and distinguishes Normal from TVHM/Mayhem. The Normal Radiation-versus-shield entry is intentionally flagged for independent in-game confirmation rather than assigned false precision.
Mayhem 11 reward-rate caution: The original November 2020 developer note said Mayhem 11 would reduce world-drop reward quantity/quality relative to Mayhem 10. Subsequent player reports disputed whether this penalty functioned as advertised. The official gear-tier equivalence is clear; a precise current independent reward-rate difference is not claimed here.
When to update this guide: If an official hotfix changes BL3 mechanics; a weapon’s unique effect or dedicated source changes; a source corrects elemental values; or the game is rebalanced on another supported version. In an updated edition, recheck named weapons, source restrictions and any numeric multiplier table, and revise this review date only after performing that check.
References and Further Reading
These sources are organized by what they establish. Official publisher documents take priority for feature and update history. Specialist databases and community mechanics research are identified as such rather than presented as statements from Gearbox’s developers.
Official game announcements, patches and systems
- 2K / Gearbox: Borderlands 3 Crossplay Update and Revenge of Revenge of the Cartels. Confirms the June 2021 level-cap increase to 72 and associated free game updates.
- 2K / Gearbox: Mayhem 2.0 Endgame Overhaul. Primary explanation of the redesigned Mayhem tiers, modifier system and stronger high-Mayhem weapon drops.
- Gearbox: Mayhem 11 Patch Notes, November 9, 2020. States that Mayhem 11 removes modifiers and awards Mayhem 10-tier weapons; records the original developer statement about world-drop rewards.
- 2K / Gearbox: Borderlands 3 Update Notes. Official changelog hub, including the August 2024 rarity-based auto-sell feature and its mission-reward warning. Check the relevant dated entry if more recent changes are made.
- 2K / Gearbox: Dedicated Loot Sources and Sanctuary Target Dummy. Explains the introduction of dedicated boss loot pools and Sanctuary III’s practice target.
- 2K / Gearbox: Eridium Reroll Machine and New Loot Vending. Establishes the April 2021 addition of the Anointment reroll machine and Maurice’s Black Market vending machine.
- 2K / Gearbox: Diamond Keys and Director’s Cut. Primary explanation of Diamond Keys, the Diamond Armory and related content requirements.
Weapon catalogs, loot sources and manufacturer identity
- Lootlemon: Borderlands 3 Weapons Database. Specialist searchable record of unique and Legendary BL3 weapons, manufacturers, elements, drop sources and variants; best used for item-by-item lookup rather than as a substitute for learning core mechanics.
- Lootlemon: Weapon DPS Calculator. A companion calculator that treats damage, projectile count and ammunition consumption as separate inputs; useful for transparent comparison.
- Borderlands Wiki: Borderlands 3 Weapons. General categories, item generation, manufacturer and historical system reference. Secondary/community-maintained.
- Borderlands Wiki: Weapon Cards. Card terminology and the distinction between final displayed damage and weapon-stat bonus lines.
- Borderlands Wiki: Weapon Names and Families. Helps verify regular weapon families, manufactured classes and their named variations.
- Windows Central: All Weapon Manufacturers in BL3. Accessible contemporaneous guide to all nine companies’ characteristic systems.
- Lootlemon: The Monarch, Kaoson, Face-puncher, Hellwalker and Plasma Coil. Five item-level records used for worked examples of alternative firing, secondary explosions, melee-classified gun damage, level/rarity tradeoffs and timed bursts.
Damage formulas, elements and advanced interactions
- Vault Hunter Hub: General Damage Breakdown. Community reverse engineering of the categories and order of damage modifiers; relevant for distinguishing additive bonuses from multiplicative systems.
- Vault Hunter Hub: Critical Hit Calculation. Separate reference for critical-hit effects, weak-point math and related modifier categories.
- Gearbox Forums Archive: Early Damage Types and Effects Discussion. August 2019 discussion summarizing prerelease elemental numbers from a creator video and game materials, used as a historical cross-check rather than as post-launch controlled testing.
- Gearbox Forums Archive: Detailed Elemental Damage Guide. Player-led explanation and testing of elemental status, Cryo, Radiation and shield/armor relationships; useful but not an official game-design specification.
- Borderlands Wiki: Elemental Damage. Cross-game elemental tables and effect descriptions. A useful reference, though several values require cross-checking against BL3-specific tests.
- Borderlands Wiki: Cryo. Documents Cryo Efficiency, slowing/freezing and the melee-damage consequence of frozen targets.
- Borderlands Wiki: Anointment. Inventory-slot activation, triggers, stacking and Anointment categories; useful secondary mechanics reference.
- Borderlands Wiki: Mayhem Mode. Mayhem scaling, gear tiers, modifiers and historical changes; cross-check against official patch notes for version-sensitive claims.
Loot management and progression
- Borderlands Wiki: Bank. Bank sharing, Sanctuary storage and equipment-storage upgrades.
- Borderlands Wiki: Storage Deck Upgrade. Differentiates backpack, bank, ammunition and Lost Loot SDUs.
- GameSpot: Director’s Cut Update and Reroll Cost. Documents the 250-Eridium cost for rerolling eligible Anointments.
Currency note: This guide has been reviewed against the sources cited as of October 23, 2026. Named item statistics and special effects can vary by parts, balance updates, game mode and character build. For a particular drop, verify the relevant weapon’s current item record rather than assuming that a single screenshot or old numerical recommendation applies to every copy.